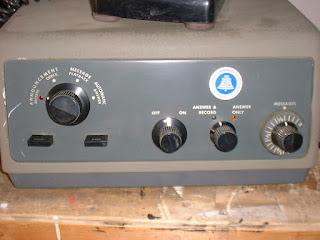
This is the story in words and pictures of the revamping of my father's first answering machine. It has sat in the attic for decades, forgotten and dusty. Well, grimy is more like it. Out of some strange inspiration, I decided to grab my camera to take shots of the progress along the way. Let's begin as it began, filthy and neglected.
Feel free to click on the pictures for a much better look.

I dusted it off a bit...


Hey! Nice knobs!!

And the rear end....


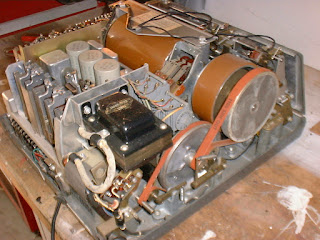
Now, this behemoth weighs almost 50 pounds, so I wanted to see what was under the hood. I started with removing the cover, but not moving anything or cleaning anything, just having a look around...

TUBES!! I can remember an old TV that had tubes in it, and we needed to wait until they warmed up before anything would happen. TUBES!!!
More tubes, paddle-looking-switches, etc...


For crying out loud! Belt-driven!! I had just gotten over the fact that this thing had tubes, and now I see it is also belt-driven!! At this point, I'm having a pretty good chuckle. The belts drive the recording drums. The smaller one is for recording the "not home now, leave a message" greeting, and the larger one is for incoming messages from callers.

Reminiscent, in my mind, of, 'Mr. Watson--come here--I want to see you.'
 This thing was made before I was made!
Top-down shots...

I don't know what's with the huge 'on-off' toggle switch right in the center of the machine, but soon I'll turn it on and see what happens!


I took a few shots of the recording head moving across the drum...


This wall of whatnot is a series of mechanical switches. If you compare the next 2 pictures, you can see that the whole contraption moves with the turning of the control knob on the front.


Time to dig in, and see what else there is in there...

More components! No wonder this thing is so heavy!!


I removed the faceplate.


Handy schematic!


Time to put it back together now. I detail-cleaned everything, including the tiny grooves in the knobs. Years of DNA gone just like that!


Plugged in, turned on, and voila! Lights!! Signs of life!!

The drums are turning and everything!! There is hope I can resurrect this beast!

Time to put the cover back on and pay some attention to the phone that is hard-wired to it.

A basic "Model 500" phone. Grimy!


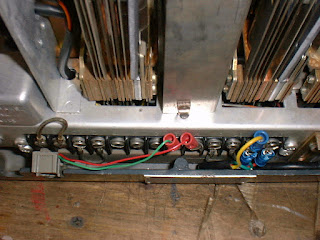
OK, I cleaned up the phone and now it is time to see if it works. I reconnected the phone to the terminal strip, and temporarily wrapped it in red electrical tape to protect the frail exposed wires while I am fiddling with it. It won't stay like this, I promise! I also replaced the worn-out rubber grommet that was doing nothing to restrain the wire from being pulled out. I added the small brass washer to the inside of it for added strength.

Hmmm... red to red, green to green, this should be a snap!

For the record, it didn't work yet. I decided to continue poking around the thing a bit more before committing myself to functionality. But before we go... yeah, that red tape was an eyesore, so I swapped it for black.
 Much better.
I noticed that the power cord was also fraying at the machine, so maybe I should fix that too. Hmmm, I'll just remove this here thingie so I can get at the mounting for it......

...adjust the crimper doohickey.......

And here we have yet another in a series of successful repairs. Is there nothing I can't do??

Yes, in fact it is becoming apparent that there are several things I can't do, and the top thing on that list is 'get this thing working'. I tried a variety of connections on the terminal strip, and spent countless hours on-line Googling around for information. I learned a ton, but as expected, not EVERYTHING on-line is true. For example, the notion that the phono jack on the side is the input. It is not, and I know that now, but I had a nice little experiment with this too.

Nope.

Not.

Nada. Time to abort that idea, and head back to the computer. More research!

I got some advice from a few friendly people over at the Phone System Tech Support forum where I had posted my questions, and one of them suggested I try this setup with a jumper (look closely; you can see the red wire tucked into the case). Ultimately, it didn't work but it got me closer. Since you have read this far, I assume you are actually interested in what is happening, so I'll include the link to the posts I made at the forum as well:
http://www.sundance-communications.com/cgi-bin/ultimatebb.cgi?/ubb/get_topic/f/45/t/000021.html
Good people over there. Tons of help given freely to a newbie!
At this point, the wires had become very weak from near-constant fiddling with, and I decided it was time to let go of the original wire connections as a matter of necessity.

SNIP!!


OK, I didn't expect to see so much string and so little actual wire inside the insulation. It wasn't easy to finagle an operational end to it, but I managed to make a connection for a few more attempts.


Following more advice....


Basically, I was using whatever I had lying around to help me make the connections I needed to make.

The definition of insanity is doing the same thing repeatedly and expecting different results, so I decided to change up my game plan. I just wanted to hear the phone ring on its own, so I disconnected it from the machine and directly connected it to the phone line. Red to red, green to green.
Nothing.
I added the yellow wire to the green, as my buddies at the support forum suggested, crossed my fingers, and dialed again.
Nothing.
Cuss!!
I dissected the phone and photographed everything I could think of, and posted the pictures at the forum.

Somewhere in here is a wrongly-connected wire, and a trained eye can spot it.

I don't have that trained eye!


 Luckily there are folks who do, and I was able to remedy the wiring snafu. Another connection to the phone line, another dial.... ring! Woo hoo!! The phone set itself works!!
And, it sounds better than our current phone. They don't make them like they used to...
Back to the machine. This thing HAS to work!! Now that I know the phone is no longer a problem, I reconnected everything the way I had it, and decided to install the jack into one of the two cut-outs in the back, where I thought it just might fit.

I had to move the jumper between the first two terminals to the top side of the terminal strip to make room for the jack.

Looks good so far....

Ahh, yes! The cover holds it in place perfectly, as if it had been designed that way all along! The greatest part of that little fact, is that I didn't have to do anything to tamper with the integrity of the unit in order to make it work, like drill a hole or something. I like things to stay as much as-they-were as possible (as evidenced by my fretting over cutting off the original wire connectors above, enough to take pictures of it first, and post them here!).


OK, but it still doesn't work. It looks nice, but I must make this thing work!! Back to the drawing board!!
While I am staring at the thing, trying to figure it out and reading the lengthy BSP's I got from my buds at the forum, I decided it would be a good idea to lubricate the points it tells me to in the guide. I did EXACTLY as it said, but created a new problem. Now, there was a moaning coming from one of the drums when it turned, which was louder as it was stopping. I figure I got too much oil somewhere that it shouldn't be, and that must have messed up the friction plates in the clutch thingy. Not really knowing what the heck I am talking about but FAR from intimidated by taking things apart, I launch into deeper surgery to rectify the problem.
Once again, I remove the stuff that is in the way so I can get to the problem. Or, what I am guessing is the problem...

Remove the cover plate, exposing the drums a little better...

And voila! The drums are out! Well, it actually took a lot more than that...

Now I can get a better look at the erasing heads (the two large black things).

Even the parts, have parts!

I cleaned off as much oil as I could from every part I could reach using whatever I had.

Now, since it was the smaller drum making the moaning sound, I decided to just assemble that one and test it alone, to make sure I was right and had fixed it.
I was right.

Back in one piece, and running as quiet as it did the day it was made. I guess. I mean, it was made before I was made, so I can only speculate. But it's darn quiet, I'll tell you that!

But I still have the functionality problem of the front ON-OFF switch killing the phone. I just don't get it. Hopefully the boys at the forum can come up with an answer soon. If not, my idle hands just might find something else to mess with!
